
Lately there have been lots of pictures on Facebook and
Instagram about all the great activities around for teaching and practicing
addition with regrouping. We've started teaching regrouping after the holidays, rather than before, and it really seems to make a difference. I hadn’t explicitly taught
the skill before January (when I originally started writing this blog post!), but many of my kiddos seemed to pick up on it pretty
quickly once we got started. But, of
course, I always have a few little ones who just have a hard time with the
whole regrouping concept. They don’t
have a strong number sense so the idea of regrouping is confusing to them. They also can't break apart numbers very well, so that is difficult, as well.
Quite a few years ago, our math consultant shared with
us a way to help these strugglers. I’ve
found it works really well in showing kids the “why” part of how regrouping
works. (NOTE: This is NOT something I
created, and unfortunately I don’t have the original article where I found the
idea.) They are called "Transition Boards" and they help to model the steps of the traditional regrouping algorithm.

I have a class set of transition boards that I made – just regular
manila oaktag, topped with red construction paper and lined with a black
marker. There is a sticker in the top
left corner of each one.

Here’s how it works:
When you are adding, hold the board so the sticker is
on the top left.
Let’s use 46 + 38 as an example. Make each number with base ten blocks (or
disks), putting the ones and the tens in the appropriate spots.


Now, start with the ones. Bring both groups of ones down to the “decision
area” (the red space).

Add them together. Are there more than 9? Can you make a 10? Do we need to regroup? Yes!
Add them together. Are there more than 9? Can you make a 10? Do we need to regroup? Yes!
Make a group of ten ones. Bring in a new tens rod to trade with.

Slide the ten ones off the board

Place the new ten at the top of the tens column
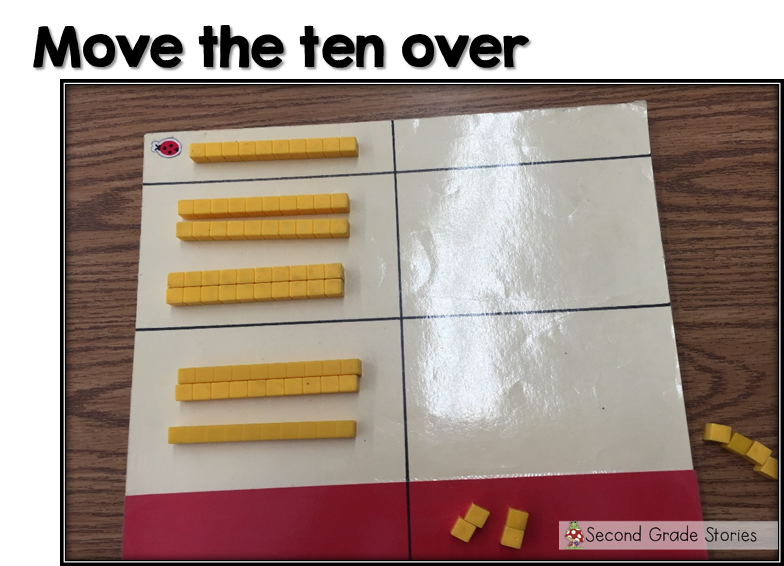
And bring the remaining ones down to the answer area (the space below the red area - no picture of this!)
Finally, look at the tens. Bring them down to the decision area and decide if you
have to regroup. (Not in this case.)

Add the tens together and bring them down to the answer
spot.

How much do we have now? There’s our answer!
We do this as many times as it takes without paper and
pencil, just talking through each step.
Once students can do the steps and explain how and why it works, we move
to bringing in the traditional algorithm. We do the same steps, one at a time, but now when we
add the ones, we write the sum to the side of the problem. Then when we trade the ten ones for a ten, we write a
“1” above the tens column on our papers.
Once we have gotten the answer, we write the sum.
I’ve found that for some students, just doing this a
few times is enough to help solidify their understanding of how place value
works with regrouping. Others need more
practice and more time.
I didn't use transition boards with the whole group when we started doing addition with regrouping this year. Looking at some formative assessments, I could see that a good part of my kiddos could probably do it without the step-by-step breakdown. We began by playing a whole class game of "Race to 100" (using big foam dice, which of course, upped the fun!) and they easily made the transition to understanding the traditional algorithm. In past years though, I've brought out the boards for everyone.
One reason my kiddos tell me they like the transition boards, is that there's a place to put the blocks for each step. Many of them got confused trading and moving blocks on the traditional 2 or 3 column base ten board, so this helped them out visually. And by including the step of solving the problem side-by-side with blocks AND the algorithm, they had a better understanding of WHY they were making that "1" above the tens column!
We've moved on to subtraction with regrouping now - and that's a whole different ball game! I do use the transition boards with the whole group when we start this concept. I'll have another post up soon with how the boards work for subtraction with regrouping. That's when I REALLY find them useful! If you have any questions about how to use the boards, just ask!


Wow! I LOVE this. Thanks so much for sharing this idea. I will be making my own Transition Boards!
ReplyDeleteKarli