Showing posts with label freebie. Show all posts

Did you ever start reading a story to your students and realize how well it could be used as a mentor text? I'm always on the lookout for mentor texts to use with my first graders for writing personal narratives. There are so many great texts out there, but I often find that some of them are too wordy or advanced for my beginning writers. Will Hillenbrand has written a series of books with Bear and Mole as the main characters that are PERFECT for using as mentor texts.


The books center around the adventures of Bear and Mole, two friends who are always doing things together. Students can connect to these books because of the simple story elements, beautifully drawn illustrations and easy to read text. Here are some ways you can use these stories as mentor texts for writing personal narratives.

Generating Ideas
It's easy to go back to these stories when you are talking about ideas for personal narratives. In Spring is Here, Mole tries to convince Bear to wake up. Ask your students if they have ever tried to get a friend to do something. In Kite Day, the two friends decide to make and fly a kite - but things do not turn out as they planned. Many students can relate to things not going as they wanted them to. Off we Go is the perfect book for young ones who are still learning or have just learned to ride without training wheels. You can create a chart showing the ideas in each book on one side, and the new ideas they sparked in your students on the other side.

Sound Words
This is an easy way for students to write like the author. Will Hillenbrand's books are filled with simple sound effects written in colorful bold type. Talk with your students about the sounds work in each part, then encourage them to find a place in their writing to add sound words like the author.

Short Sentences
This another technique that works well for beginning writers. In each Bear and Mole story, there is always a part where the author tells what happens in short sentences (always using the past tense - another great skill to practice!) Have students choose a place in their writing where the character is doing something. How could they break it down into smaller parts?

Dialogue and Dialogue tags
Bear and Mole talk to each other throughout the story, which lends to using this book to teach adding dialogue as a technique. Choose different parts in the story and talk about what the characters said. Students can add dialogue to their stories. This series of book is great for talking about using words other than "said." Go through and list all the words the author uses and you'll see how many different choices there are! You can talk with your students about the meaning of each word and why it fits best in the sentence.

Leads
Every Bear and Mole story starts with action. 
"Bear looked at the sky."
"Bear picked books off the shelf."
"Mole pushed aside some dirt."
"Mole woke up."
Have your students put themselves right at the beginning of their story and act out what they are doing. Have a partner describe what is happening. By acting out the action first, students can "see" what they need to write.

These simple stories are so rich with ideas for how to write a personal narrative. If you're using a workshop approach in your classroom, you can use these ideas for mini-lessons and have students try it out in their own writing. If you need a more structured way for students to practice each of these techniques, I created a practice activity for each idea. 


You can grab this FREE resource by clicking on the image above. 


With the end of the school year fast approaching, my friends and I over at The Reading Crew decided to get together and do a blog link-up filled with all things summer! You can find ideas for end of the school year activities, summer reading and more. Each blog post has a freebie for you, as well. Annnnddd.... since we know most of us don't have time to read for ourselves during the school year, summer is the time to catch up on some great books. We are hosting a giveaway of books to fill your summer reading time. Keep reading to find out about the fun!


The start of summer is a great time to learn about sharks. I love to do a week about sharks toward the end of the year when my kiddos are starting to lose interest and need something engaging and exciting to keep that interest going. And what's more interesting to kids than sharks?! I like to get as much mileage out of a topic as possible, so I'm always looking to find ways to integrate different subjects.

I love to start my shark week activities with a book - and there are TONS of great books about sharks out there. My favorite one to start out with is by Nicola Davies, called Surprising Sharks.


The biggest reason why I like to start with this book is that it makes sharks a little less intimidating. Don't get me wrong, the author shares some amazing shark facts that definitely make my kiddos say, "WOW!" - but the illustrations and focus are a little less scary  - and by the end of the book everyone wants to know more about these animals!

Here are a few ideas for some "after reading" activities:
  • Talk about the fact that surprised you the most - make a chart, write about it in a journal, share with a partner
  • Changing schema - was there something you thought was rue before, but now you know is not? (or vice versa?)
  • Opinion writing - Should people be scared of sharks? Use info from the book in your reason
I always like to integrate nonfiction into everything possible - and studying sharks is a great opportunity to bring in some math! This book by Jerry Pallotta is so much fun.


The book uses math to teach information about sharks! There is everything from the size of sharks (big, bigger, biggest), to how much they weigh, how far down they can swim, temperature, etc.... this book puts a new twist on learning about sharks! The focus in this book is on greater than and less than, but you could fit any shark facts into your math curriculum.

How can you bring this idea into the classroom? Easy! Just think NUMBERS! There are so many numbers associated with sharks - number of teeth, how long they are, how much they weigh, how many babies they have....
  • Have students do some research and find out different numbers that have to do with sharks. Challenge them to come up with questions comparing information about two or more sharks.
  • Create a "Math About Sharks" poster with a shark illustration and facts that include numbers.
  • Work in groups to focus on one type of comparison - big, bigger biggest (teeth, bodies, etc.); light, heavy, heavier, heaviest; deep, deeper deepest
Here's a little freebie I created using the weight of different sharks.

https://drive.google.com/file/d/0B2ize_mAbVGMQ2pmZUdUeUo0R1k/view?usp=sharing

You could use this in lots of ways! Hang the task cards around the room and give each student a copy of the shark facts and answer sheet (double-sided). Students walk around the room using their fact sheet to answer the questions. Shrink down the answer sheet (85% works well) and have students glue it into a notebook and write their answers there. Use it as a center!

This freebie is part of a larger resource with even more ways to integrate math and shark facts. Click on the image to see the entire resource.

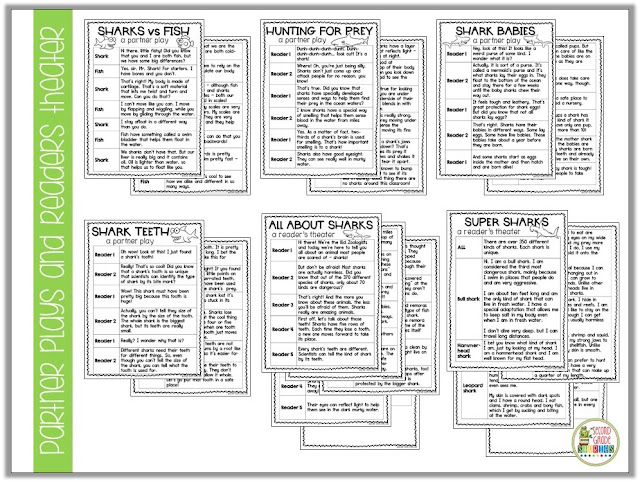
Looking for MORE shark activities? I love using reader's theater in my classroom! It's just another way to integrate subjects - this time nonfiction/science and reading fluency. This resource contains 4 partner plays and 2 reader's theater (6 parts) scripts.

https://www.teacherspayteachers.com/Product/Sharks-Nonfiction-Readers-Theater-2621790

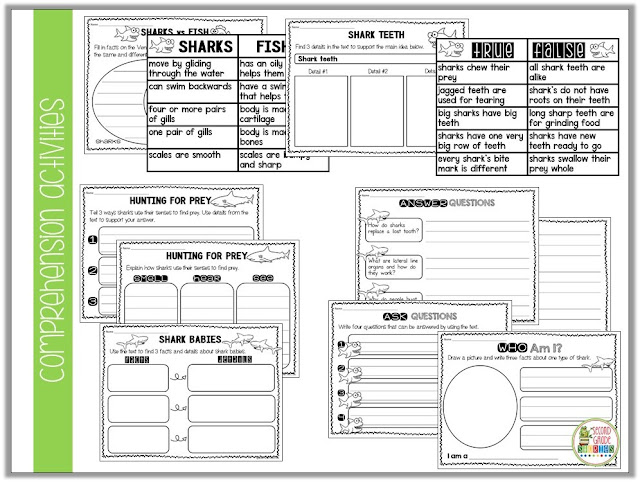
There are comprehension activities to do with all the plays.
https://www.teacherspayteachers.com/Product/Sharks-Nonfiction-Readers-Theater-2621790

There's also a flip book to go with the "All About Sharks" script, and a fact card sort for the "Super Sharks" script. They're all written at about a mid-end of second grade level. You can click the images to find out more!

If you're looking for more summer ideas, you can click on the blog links below to visit my other Reading Crew friends and see what they are sharing. We are all giving away a copy of a great summertime read. I'm sharing The Great Alone, by Kristin Hannah. 

You can enter the giveaway through the rafflecopter right here.
a Rafflecopter giveaway
You are invited to the Inlinkz link party!
Click here to enter


Happy December!!  Yes, that's right - December. A month filled with lights and carols and joy and giving. And if you're in the classroom, add to that a month filled with a little craziness and excitement! We can all use some fantastic ideas for our classroom right about now, so I'm linking up with my friends over at I Teach Second for the first of what will be a monthly linky:
 
This linky is filled with great ideas you can use in your classroom - now and after the holidays!


Sometimes our little ones forget that this month isn't all about them. I go out of my way each year to actually TEACH my students how to be kind, respectful and caring towards others. Although kids can easily share some of the big things they do to show kindness - food drives, helping another student, etc. - they often don't realize that it's the LITTLE things that can count the most.
 
December 1st brings the entrance of a new friend to our classroom... meet the Kindness Elf.

I know that Kindness Elves are not new - I've seen many classrooms doing them now instead of the traditional OTHER elf.  For me, I was looking to use them to show students how they could show kindness every day - even in the little things they did... and that the result of that kindness could be very powerful, even if they didn't know it. I started doing this last year in my room after seeing a blog post from The Imagination Tree. Her post focuses on Kindness Elves at home, but I was inspired to come up with a way to infuse kindness into our classroom.  I decided to create a "Kindness Challenge!"
I found some little elves on Amazon and knew they would be perfect for my little covert operation.  There are 4 different elves and they each have Velcro on their hands - perfect for hanging around the room! (It seems that the price has gone WAY up from last year! I know I did not spend over $20 on these guys!)
The next part was to come up with 18 different ways (yep, that's how many school days till Christmas break!) students could show kindness.  I wanted most of those ways to be easy and quick.  It's going to be the little things that matter when we're trying to develop a culture of kindness. I wanted them to realize that it's not always the bigger things we do that count - it's the little, everyday actions that mean the most.
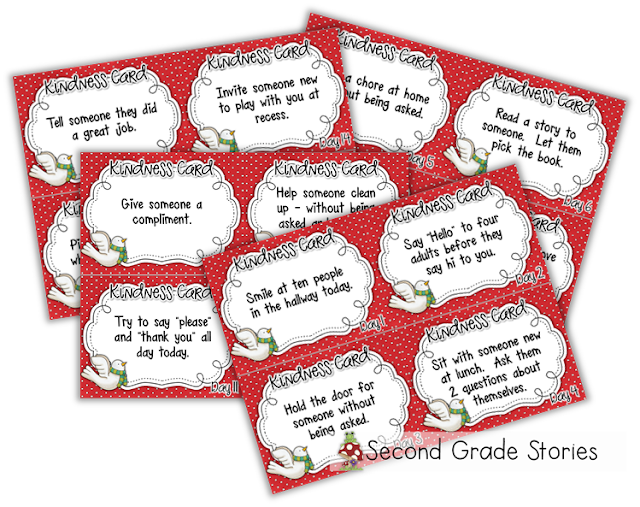
Soooo... after a bit of brainstorming... here are the "Kindness Cards" that the elves will be bringing each day! (You can click on the image to download them - black and white version, too!)
https://drive.google.com/file/d/0B2ize_mAbVGMNWNRWXVEUEhhQ3c/view?usp=sharing

The plan is to have one of the elves bring a card every day until Christmas break.  They might show up in the morning, after lunch or even right before we go home.  I chose acts of kindness that would be easy for my kiddos to do. I also mixed in things they could do at home, as well. Spread the good cheer! Each day, when the elf, appears, we read the kindness challenge card and talked about how we can successfully accomplish it. We also talked about the impact each little act of kindness could have on our classroom, grade level, school and family.
 
I can honestly say the focus and conscious effort on teaching kindness in a meaningful way definitely had a positive impact on our classroom community. I noticed students continuing to do kind things even after Christmas break and they also began noticing when others did something for them.
 
This year, I'm changing it up a bit. I'm still going with the kindness theme, but after seeing this creative poster from Digital: Divide and Conquer, I knew the elves would be replaced by a kindness reindeer!


https://www.teacherspayteachers.com/Product/Remember-to-be-a-Reindeer-Positive-Thinking-Poster-Set-2221454

I printed and laminated (4 to a page) the cards to make the poster, and the reindeer will bring them along on the first day when she makes her appearance. (You can snag the posters by clicking on the image.) I'm excited to start this with my class this year.  I have such a wonderfully caring group of students I know they will really take this to heart.  And who knows - if kindness takes over classrooms everywhere, think of what a huge impact we can all have on our little part of the world!
 
If you're doing kindness elves - or any kindness acts in your classroom, I'd love to hear from you! And be sure to check out some of the other great ideas in the link up!


post signature
Science is important. It is engaging. And it is fun!  If you missed the first part about how I set the stage for my little scientists, you can go back and read about that {HERE}.  Now we are ready to apply what we have learned about being a scientist.


Since my kiddos were now pros at being a scientist - they could measure, observe, classify and communicate with the best of them, it was time for the final piece. The mystery box came out again, and this time it held MORE excitement!


We went through each item, one by one, talking about how it might be used. The magnifying lasses and safety goggles we already knew about... but now we had lab coats, too!

The lab coats were inspired by Becca from Foxwell Forest and this great pin!
http://foxwellforest.blogspot.com/2013/02/becoming-scientists-and-freebie.html

They were easy peasy to make - I just cut size XL boys tshirts up the middle and voila! This was a great photo op (which unfortunately, I cant show you!), but imagine a class of second graders, dressed in lab coats, and safety goggles, all holding magnifying glasses and striking their best "scientist" poses. What a hoot!

But we're not done with the box yet! There was also a bottle of soda (clear), a box of raisins and some clear plastic cups. Next to those were a set of recording sheets. If we weren't excited before, we sure were now! We all sat together and I posed the question, "What do you think will happen when we add raisins to a cup of soda?" Now I have to tell you, I was AMAZED at the thoughtful, analytic and creative answers I got! We immediately started recording our ideas (spur of the moment, as you can see by the charts pushed over to make room!)

"I think the raisins will disintegrate." (Someone suggested the word "dissolve" instead)
"They're going to get bigger because they'll absorb the soda." (that statement led to "I think they'll turn into grapes because raisins are just dried out grapes!)
"The water will turn purple because the color will come off the grapes. It's like putting a mix in water."

WOW!

Then came the questions.
"If we put the raisins in the bottle and shake the bottle,, will the raisins come shooting out?
"What if we used a different kind of soda?"
"Will water work the same as soda?"

I'm telling you, I couldn't have asked for a better group of scientists! Now that we had our predictions (we introduced the word 'hypothesis'), we recorded our thinking.
(pic)

Ready for the experiment? First step, pour soda in the cup. We stopped and observed and draw and wrote and talked about what we saw. Bubbles. Lots of bubbles. Where in the cup were they? How do you think they will affect the raisins? (Didn't remember to take pictures until the next step!)

Next, drop in the raisins! I added a little musical touch to this part by playing salsa music as we dropped in the raisins. If you're going to have dancing raisins, you might as well add some dance music! My kiddos oohed and aahed and laughed and watched as he raisins were covered in bubbles, lifted up to the top of the cup, stayed on the surface for a moment while some bubbles popped, and then drifted back down to the bottom to start all over again. Dancing raisins!


After more observing and drawing and writing we waited a bit to see what the raisins would do. They slowly sunk to the bottom of the cup and stayed there. Why? We noticed that there were a lot fewer bubbles in the soda than when we started. Fewer bubbles meant fewer dancing raisins.


We finished our recording by writing an explanation of what had happened. Then we returned to our predictions to see how each one worked out. We had some amazing scientific talk, had a chance to observe very carefully and had some fun in the process!

If you'd like to do the dancing raisins experiment with your class, you can download the sheets by clicking on the image below. You can also visit my store and take a look at my "Being a Scientist" resource to see how we started our unit.
https://drive.google.com/file/d/0B2ize_mAbVGMRUR6WDZBMklKUUE/view?usp=sharing


My kiddos are so excited about everything science related now, and we have some great science vocabulary words to be able to use, as well. Throughout this introduction to science, I've used lots of great books to get my students excited and learn more about science. Head over to read PART 3: Being a Scientist to see some of the titles I use.

post signature
It's time to talk about how to make those rules you've created with your students really come to life.
If you missed be beginning post on creating rules in the classroom, you can jump to it {HERE}. Today I'll be sharing part 2 of my rules series - how I help my students get a clearer understanding of what our rules mean.


In our school we do a sort of modified PBIS thing. (Which means, we are not officially a PBIS school, but we use some of the ideas!) Our school mascot is a husky, so our principal created an acronym that says our students: Have responsibility, Use honesty, Show respect for others, and Keep safe In Every Setting. So we focus on being responsible, respectful, safe and honest.  These rules are already established at the beginning of the year, and my incoming students already know them by heart.  It is my job to help them understand what the rules look like - not just in the classroom, but in all areas of the building. I do this over the course of the first few weeks of school.

First, I start by talking with my kiddos about what our rules are, why we have them and what they think each rules means. We keep track of our ideas on a brainstorming sheet for each rule. We also brainstorm what the rules look like in different places in the building - classroom, playground, cafeteria, bathroom, hallway...
I project these onto my SmartBoard and we fill them up with ideas! (Remember, I do this over a period of time, so we don't do every rule and every place at once! It depends what I see we need to work on.)

I find that while students are usually good at TELLING me the rules, they often have a difficult time EXPLAINING the rules. So we work with two guiding questions: "What does this rule LOOK like?" and "What does this rule SOUND like?" I often have my students work in pairs to come up with these ideas. If someone walked into the room/hall/cafeteria, etc.. How would they know everyone was following the rules? What would they be saying? What would they be doing?


I find the "looks like/sounds like" idea to give more structure, but I have also had partners just come up with a list of 3 ways we can show that specific rule. Sometimes we all use the same recording sheet and sometimes we mix it up.

We also take time to think about how the rules will look in different settings. Being safe in the classroom will look different from being safe on the playground.

These sheets don't stand on their own! We do a LOT of modeling and practicing, too! Each morning at morning meeting we have friends demonstrate the correct (and sometimes, the NOT correct!) way to show a rule in a certain setting. We also go to the different places and practice, too.

Now that we've described the rules and know what they look like and sound like, it's time to really think about them in different ways. I'm a big fan of using movement in the classroom to teach anything, so we often play a game of Four Corners to practice the rules. I make a sign for each of our 4 rules and hang them near the four corners of our classroom.  Each student (or pair of students) gets a card with an action on it. It is their job to move to the corner/rule that best describes their card. My kiddos love this game! Once everyone is in a corner, I call on a couple students to share why they made their choice. Then we mix up the cards and play again.


I also created an activity for students to sort behaviors that "rock" the rules or behaviors that "wreck" the rules. I have a ROCK and WRECK heading and actions that are both good and not so good choices.  Sometime I do this in a small group and have students sort the cards. Other times we do it altogether and have one student choose a card and act out that behavior. (I usually give them a clue of where the behavior is taking place so it's a little easier to guess!) Then the rest of the group decides if it ROCKS or WRECKS the rules. (Insert sound effects and hand motions here and you have a great interactive activity!) You can do this with a whiteboard for each header and student-generated ideas for each behavior, as well.


And finally, I also want my students to think about situations they might be in when they have to think about making the right choice. It's easy to SAY what you're going to do, but as we all know, actions speak louder than words! I created a set of discussion cards that my students can talk about in small groups. One person chooses a card and reads the situation and we discuss the best way to respond and why. This is a great way to start working on speaking and listening skills, too - as well as how to have a discussion with others. Some students need more structure, so I also have the same cards with choices of what to do. The group talks about each option, decides how it will affect the person and others, and chooses the behavior that ROCKS the rules!


Whew! After all that, we are definitely capable of ROCKING the rules! My kiddos know what the rules are, they know what each rule sounds like and looks like in different settings and they have modeled and discussed how to follow the rules.  I usually don't use all these sheets or activities at the beginning of the year. Instead, I pick and choose what it seems my group needs to work on at different points during the year. It is even more important to go back and review the rules as it is to create and define them!

Looking to use some of these ideas in your own classroom? I put the brainstorming sheets for each setting into a file you can download as a freebie! Just click on the image below.
https://drive.google.com/file/d/0B2ize_mAbVGMTXlzM3ZfOWtMcUU/view?usp=sharing
 
And if you're interested in seeing the whole resource, you can check out my "Rock the Rules" {HERE}.


If you missed any of my other posts on creating classroom rules, here they are:

Now... what would a discussion and activities about the rules be without some read alouds to inspire some thinking? The last post in this series shares some fantastic books to use when you are working with classroom rules.
Creating Classroom Rules: PART 3 Rule Read-alouds

post signature
Happy Thursday, folks! Just a quick stop-in today to let you know that I blogged over at Whos' Who yesterday and shared a little update on my "One iPad in the Classroom" post. (You can read the original post {HERE}).  I added a few more ideas and shared some new ways to integrate technology into your classroom, even if you only have a limited number of ipads or tablets.  Click on the link image below to find out more! (There's a freebie there, too!)

http://whoswhoandnew.blogspot.com/2015/07/what-do-i-do-with-just-one-ipad-in-my.html


post signature
Happy Sunday!  Are you looking for a quick and easy-prep activity for these last few days of school, summer school or even next year? I blogged over at iTeachSecond today and shared a sample activity from my Bundle of Beach Fun.

http://www.iteachsecond.com/2015/06/beach-editing-fun-sample-sunday.html

post signature

Happy Sunday! My view this morning overlooks the lake and I am happily writing my to-do list of blog posts and TpT resources to work on this summer.  Before I start this post, I want to remind everyone about my little giveaway going on over at iTeachSecond.  Today is the last day to enter so click on the picture to find out more!

http://www.iteachsecond.com/2015/06/win-it-wednesday-wiggle-it.html


Now, on to the purpose of this post - ice cream! Have you ever had one of those times when you just didn't want to do a big activity, but decided to anyway - and it was really worth it? That's what happened on day "I" of our end-of-year ABC countdown. I did not originally plan to make ice cream in the classroom.  First of all, it was about 100 degrees all week that week and while EATING ice cream sounded good, MAKING it just seemed like too much work.  I'm really glad I changed my mind, though... it was super easy and really fun (and maybe a little mess, too!)


I started by asking my kiddos how they thought ice cream was made.  What are the ingredients? What do you do with them?  We then read a great book from Reading A-Z on making ice cream and compared our ideas to the real thing.  We wrote a quick 4-step summary , which would serve as our plan sheet for writing later that afternoon. Gail Gibbons also has a great book about how ice cream is made. We read that one before we started our own ice cream making project.


Making the ice cream was easy! First we laid out the ingredients.

 We had one table set up to put together the big bag with the ice and the salt

 And another table for the smaller bag with the half-and-half, sugar and vanilla.


I had my kiddos work in partners - one person did the big bag, the other did the small bag, then they switched and did it again so everyone had their own ice cream making bags.

Then the fun began! Put the smaller bag inside the bigger bag - make sure it is covered with the ice  and SEALED TIGHTLY. 
 

Then start shaking!


It took about 5 minutes for my most exuberant shakers to have ice cream - and once everyone else saw it, they started working even harder! The ice cream was delicious!


After we cleaned up, we used our how-to summary from the morning to write an informational piece on how to make ice cream. I stapled a copy of the recipe to their writing and sent it home for them to try.  Two of my students have already done it at home with great success!

You can download the recipe I used, along with the planning sheet and writing paper by clicking on the image below.
https://drive.google.com/file/d/0B2ize_mAbVGMRDV1VFRjM3ExUkU/view?usp=sharing


Making ice cream is a great activity for the end of the year, or during the summer. Have you ever made ice cream with your kiddos?


post signature
Back to Top